63
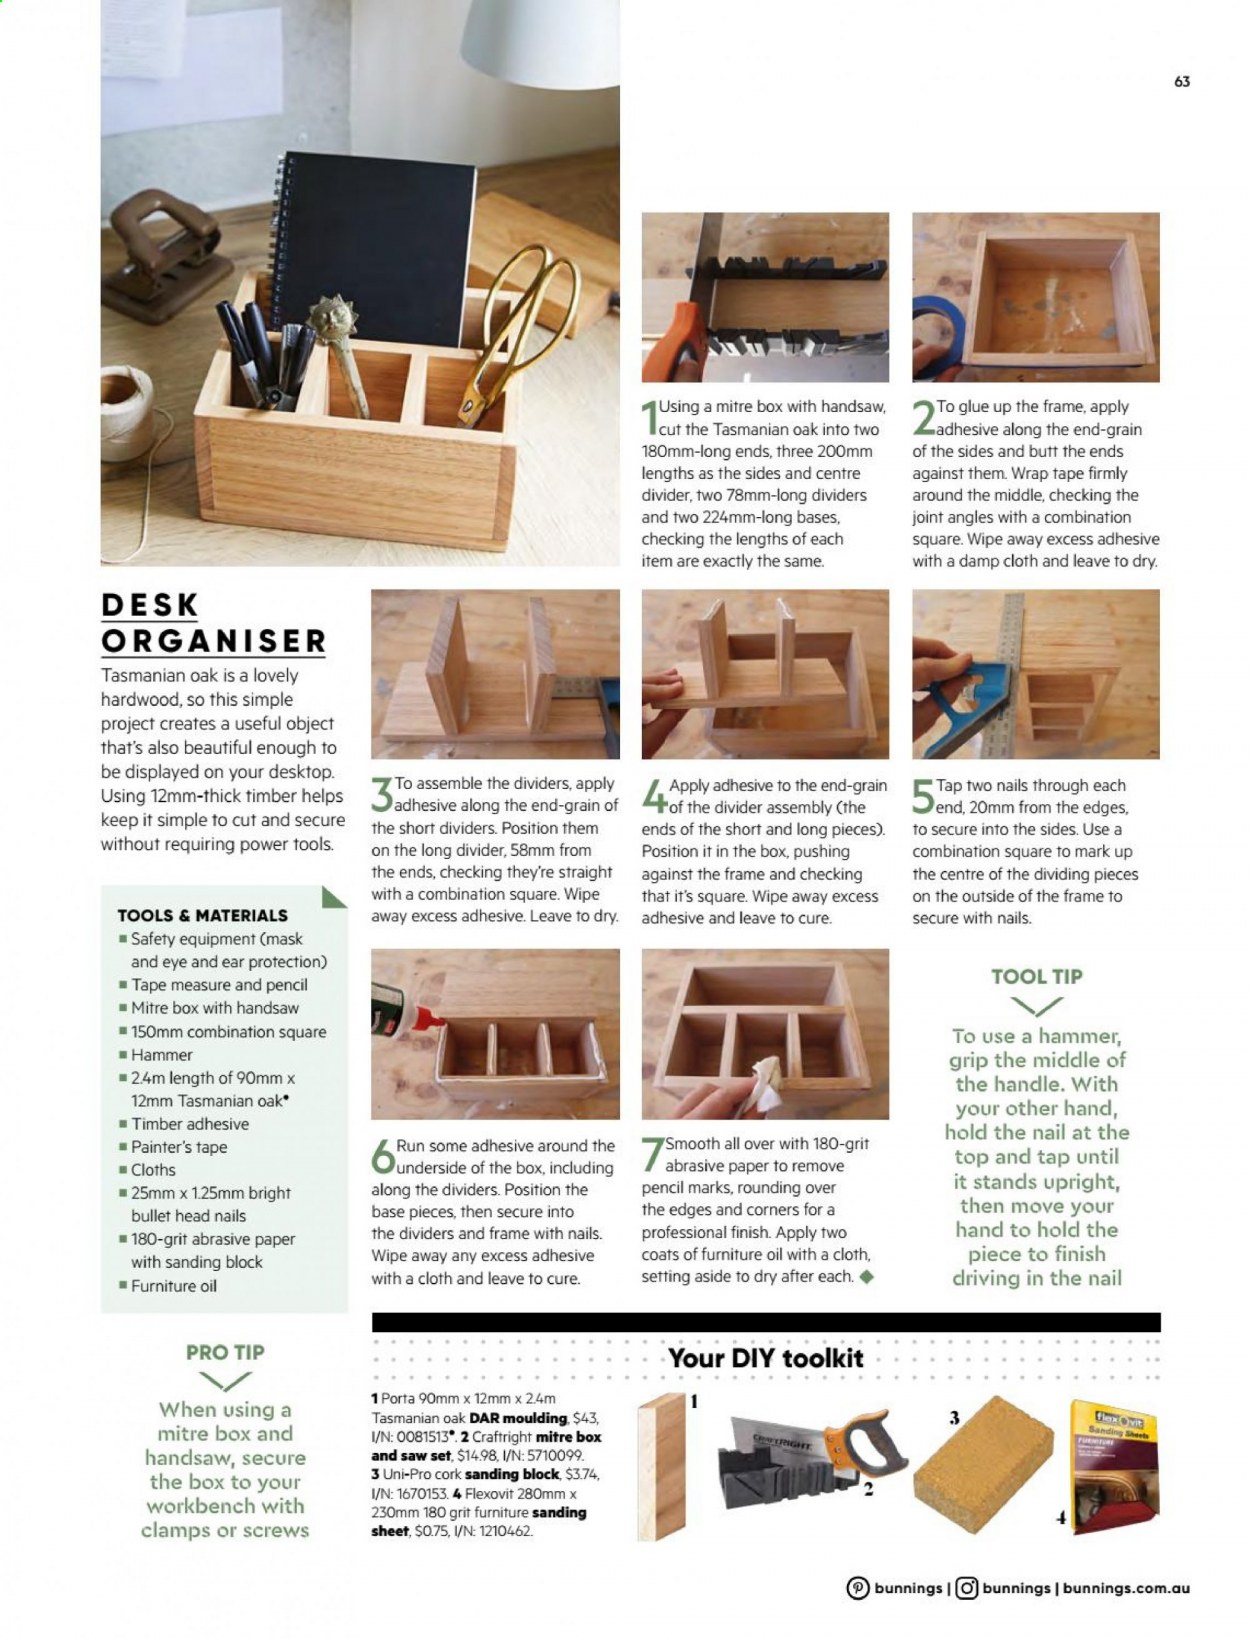
Using a mitre box with handsaw, To glue up the frame, apply
cut the Tasmanian oak into two
-adhesive along the end-grain
180mm-long ends, three 200mm
lengths as the sides and centre
divider, two 78mm-long dividers
and two 224mm-long bases,
checking the lengths of each
item are exactly the same.
of the sides and butt the ends
against them. Wrap tape firmly
around the middle, checking the
joint angles with a combination
square. Wipe away excess adhesive
with a damp cloth and leave to dry.
DESK
ORGANISER
Tasmanian oak is a lovely
hardwood, so this simple
project creates a useful object
that's also beautiful enough to
be displayed on your desktop.
Using 12mm-thick timber helps
keep it simple to cut and secure the short dividers. Position them
without requiring power tools.
Tap two nails through each
Apply adhesive to the end-grain5end 20mm from the edges,
To assemble the dividers, apply
adhesive along the end-grain of 4of the divider assembly (the
on the long divider, 58mm from
the ends, checking they're straight
with a combination square. Wipe
ends of the short and long pieces).
Position it in the box, pushing
against the frame and checking
that it's square. Wipe away excess
away excess adhesive. Leave to dry. adhesive and leave to cure.
to secure into the sides. Use a
combination square to mark up
the centre of the dividing pieces
on the outside of the frame to
TOOLS & MATERIALS
secure with nails.
Safety equipment (mask
and eye and ear protection)
- Tape measure and pencil
- Mitre box with handsaw
1 150mm combination square
TOOL TIP
To use a hammer,
grip the middle of
the handle. With
your other hand,
hold the nail at the
Hammer
124m length of 90mm x
12mm Tasmanian oak
- Timber adhesive
- Painter's tape
- Cloths
1 25mm x 1.25mm bright
bullet head nails
1 180-grit abrasive paper
with sanding block
Furniture oil
Run some adhesive around The /abrasive paper to remove
underside of the box, including
along the dividers. Position the
base pieces, then secure into
the dividers and frame with nails.
Smooth all over with 180-grit
65
pencil marks, rounding over
the edges and corners for a
professional finish. Apply two
coats of furniture oil with a cloth,
top and tap until
it stands upright,
then move your
hand to hold the
piece to finish
driving in the nail
Wipe away any excess adhesive
with a cloth and leave to cure.
setting aside to dry after each.
PRO TIP
Your DIY toolkit
1 Porta 90mm x 12mm x 24m
Tasmanian oak DAR moulding. $43,
I/N: 0081513°. 2 Craftright mitre box
and saw set, $14.98, I/N: 5710099.
3 Uni-Pro cork sanding block, $3.74,
I/N: 1670153. 4 Flexovit 280mm x
230mm 180 grit furniture sanding
sheet, $0.75, I/N: 1210462.
When using a
mitre box and
flex vit
Sanding Sheets
PENIT
3
CraTRIGHT
handsaw, secure
the box to your
workbench with
clamps or screws
bunnings | O bunnings | bunnings.com.au